Pages

Thursday, February 26, 2015

Building Kids Stools


So 2 weeks ago I posted about Building a Kids Table. Once you have a table you have to have a place to sit...am I right? The plans are from Ana White but I modified the plans to make stools instead since our kids are quite crazy (we have one small wooden chair that was given to us and it ends up toppled over due to kids sitting on the back.)

So here's how it went down. I turned the space heater on and got to measuring. 


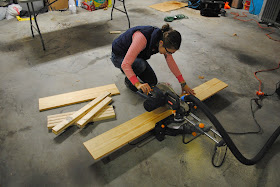
I cut all my wood to size according to the plans except for the back legs. I cut them to the same size as the front legs.


Make sure you're wearing your protective ear and eyewear. 


I then used my Kreg Jig to drill my pocket holes for the aprons to makes the base of the stool.


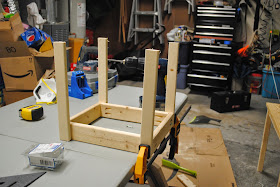
After the pocket holes were added, I assembled the base of the stool making sure that everything was square as I worked. Then using the pocket holes I screwed the legs onto the base.


That's a pretty good looking stool so far. 


Then I carefully measured in-between the legs to add the supports.


Added a few quick pocket holes and forced it into the gap.


Next up was adding the slats to the top.


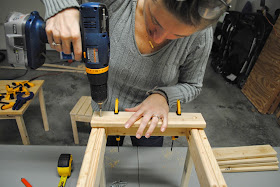
Using my counter sink drill bit I drilled both ends of every slat.


Secure the slats onto the base of the stool with screws.


The last step is to sand everything down as smooth as you can. It's bad enough the kids are going to flip them over pretending they are mountains but theres no need for them to get splinters too.


There you have it. A nice little stool for you Kids Table!


Now all that is left is to fill the holes with wood glue give those a brief sanding and then I still have to choose a color for both the stools as well as the table.


Thursday, February 12, 2015

Building a Kids Table


So I'm slightly obsessed with Ana White's website thanks to my friend Jen over at The House of Wood. Ana provides plans to build all sorts of things and they are a much better for my budget than purchasing furniture from a high end store. (In our house we are budgeting fools. We've been following Dave Ramsey's Financial Peace University since we got engaged.) Strolling into Pottery Barn or Restoration Hardware and purchasing what we want not is not an option. But planning and budgeting to build things....we do that very well. 

Here we go! After printing the plans and a quick run to Home Depot for the lumber, I got the heater running in the garage  (it's like 30 degrees out....and this FL girl isn't a fan of cold weather) and pulled out all the tools for the job.


First things first. I had to get all the measurements marked before I could cut all the wood down to size.


Please make sure you wear the appropriate eye and ear protection when working with power tools! (I tend to listen to 90's alternative music...which is what was in my portable cd player back in the day during training sessions for volleyball, weightlifting, and track...it gets me pumped up to do work.)


Next I added pocket holes to all the wood using my Kreg Jig. (this is an amazing little tool to have)


Nothing better than a hubby who grabs you some coffee when you're half way through building. 


Look at all those pocket holes!


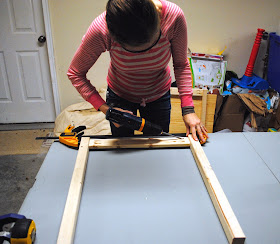
Here's where it gets fun. The assembly! First up putting the table top together.


Then screwing the aprons to the table legs.


Then it was time to put all the legs together.


Next up the table top.


This was a quick and easy build. With a quick stop to make dinner and eat with my family it took me just a few hours to get it done.


How stinking cute is this little table! It's perfect for the kids.


For now I'm leaving it in it's natural color because we have big plans for our bonus room (the playground as the kids call it) this year. Since we homeschool the kids we have a lot of work to do to make it a more functional space and this table is where the kids will be doing their schoolwork everyday. Bit by bit we'll have the room more functional. On a later post I'll show you the stools I made to go with the table. 

What are you favorite colors for a kids playroom? 


Tuesday, February 3, 2015

The Laundry Room Organized


Our laundry room is how we get from the garage to the house. Therefore, it's become a dumping ground. We throw everything on top of the washer, dryer, and deep freezer. I was constantly losing things that were falling behind the appliances. Searching through piles of clothes, towels, jackets and bags to find a pair of matching socks. So something had to be done and quickly. I'm all about saving money so I made some simple storage with existing supplies to help organize this space.


These bins I picked up at my local Target. The first basket is to throw the kids clothes in when we make messes downstairs (their laundry baskets are on the second floor in their rooms.)

The second basket is for towels. I change out my kitchen towels every other day (more often if a little uses it as a napkin.) Since I use micro fiber towels for cleaning and wiping up spills I now I have a place to put them as I use them. 

The third basket is for all my delicate/hand wash items. Since I spend a lot of my time at the volleyball gym or working out every day it's rare I wear these clothes but when I do I tend to make the mistake of throwing them in the wash with all the other clothes. But now I have a designated place to put them.


Luckily when we bought our house they already had some nice upper cabinets and shelves installed which have been helpful and hiding all of our cleaning supplies.


One of the most helpful things in my laundry room is Martha Stewart's stain chart that I put in a frame from Micheal's. 


For the tops of the upper cabinets I hated having wasted space and every mom with a kid in diapers has several diaper boxes lying around. I use this tutorial to cover several boxes with fabric to store items such as contact solution, tissues, and toothpaste. (I chose not to do the inside liners since my boxes are up out of sight.)


It also gives the space a little bit of color since I haven't been able to choose a paint color for the room.


I found two small canvases that I was no longer using and used the same fabric from the storage boxes for this wall that was blank. 


Its a narrow space but its nice to have a designated laundry room that is organized and doesn't cause stress every time I come into the house from running errands.

What's your favorite organization item for your laundry room?