I came across these adorable Chalkboard Labels while searching on Pinterest from Simply Organized. I was so excited I had to make them.
So a quick run to Home Depot and I picked up two pieces of Poplar hobby board which cost me about $5 after tax.
Got out MY measuring tape (yes I have my very own measuring tape...no sharing), a pencil and a speed square. (nice straight lines make me happy.)
My boards were 24 inches so I decided to make each chalkboard 3 inches.
All measured out and ready to cut with the miter saw. (if you don't have a saw the guys at Home Depot or Lowes can cut it for you.)
It's been really cold outside lately so I set up in the garage with a space heater.
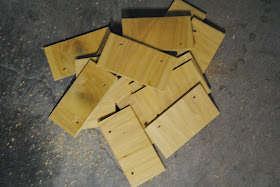
16 chalkboard labels ready for the next step.
I pre-marked all my holes to drill.
Then I picked a drill bit slightly thicker than my twine for the holes.
I got to paint outside since we actually had a somewhat warm and sunny day instead of being stuck in the garage.
For a project like this I would prefer to use spray paint for a quick even coat but I found this can of chalkboard paint returned and marked down for $3 a few months ago. Since I already had it on hand I decided to go ahead and use it.
I'm in love! What do you think of the gray?
If you happen to count you'll only see 15 boards. My 2 year old stole one when I wasn't looking and was using it to dig up mulch.
I was painting downwind of a shedding dog...I can't even tell you how many times I had to pull fur out of the paint....maybe I should have stayed in the garage.
Personally I love getting a little messy when painting.
Final coats are done now time to let them dry and clean up.
After I let the boards dry overnight I brought them in to start labeling and adding them to bins.
My supplies. Some twine and pastels (I like to use pastels for my chalkboards since I tend to change them rather often and these are leftover from my days of doing chalkboard art in local restaurants...bonus!) Once I've finalized I like the way things are then I'll get a chalkboard pen.
Threaded the twine through the first hole and secured it with a knot then I'll feed it through the handle of the bin and tie to the front of the board and repeat on the other side. If you have a bin with a sturdy handle you can just tie it off on the other side.
(This is a bookshelf in our linen closet that I am converting to all things crafting since I do not have a designated room in the house.
But that will have to be another post.)
Did you notice that these are the bins I got at Target on clearance! You can see that post here.
Chalkboard Labels
2 Poplar boards: $5
Chalkboard paint: already owned
Twine: already owned
Pastels: already owned
Total: $5 for 16 labels. (15 actually my son won't give me back #16)
How do you like to organize and label your home?


Cute idea :)
ReplyDeleteSophie x
Your-girl-is-lovely
Thanks Sophie!
DeleteNeat project! Thanks for sharing! I've been searching everywhere for the right mini chalkboard labels - think I just found my solution! Visiting from a house full of sunshine.
ReplyDeleteKaren thanks for coming by! Hope they work out for you!
ReplyDeleteErin
Those tags are just perfect! I love them!
ReplyDeleteIt turned out great! I really love this wooden chalkboard labels idea!
ReplyDeleteI absolutely need to do this! My youngest is now reading and this would look so much better in our playroom!
ReplyDeleteHi Amy. My son loves them in his room and the playroom! He know where things are supposed to go.
DeleteMy teacher friends would love these. I think these would work well as educational accessories as well.
ReplyDeleteThis comment has been removed by a blog administrator.
ReplyDelete